


-
1/24 Cars Bought In 2026
Forum: 1:24, 1:25 & 1:28 Scale
Last Post: DPJ -
Slot Wagen NASCAR Truck k...
Forum: 1:32 Scale
Last Post: Savage GT -
SlotForge Timing - (Track...
Forum: Race Control
Last Post: theDutchmanJames -
Moron posts pics without ...
Forum: 1:32 Scale
Last Post: Top Down -
Shenanigans Raceway Race ...
Forum: NSW Slot Car Group
Last Post: Johnno
- Forum posts: 48,442
- Forum threads: 5,009
- Members: 1,693
- Latest member: jschmidt86
Upcoming Events
WHO Autumn Stages - 28th-Oct-26
WHO Nascar - 4th-Nov-26
NSCC Leatherhead Swapmeet - 8th-Nov-26 ( - {4})
WHO Tin Top Saturday - 14th-Nov-26
WHO Test & Fun Night - 18th-Nov-26
WHO F1 - 2nd-Dec-26
WHO Tin Top Saturday - 12th-Dec-26
Swindon Swapmeet - 10th-Jan-27


Anthony is away this week, so I'm afraid your usual host for the weekly thread is unavailable.
Unfortunately, before he left, he made the huge mistake of asking us to choose a topic for this week's discussion. Obviously we could have been sensible. We could have chosen one of the many excellent suggestions that have been made, or at the very least we could have chosen something vaguely related to slot cars.
But no, that will all have to wait for future weeks, when normal service will no doubt be resumed. Because, for this week we've chosen the topic ...
CLASSIC T.V. THEME TUNES
We're asking you to delve into your past, dig up those old memories, and post your favourite TV theme tunes.
Here's one of my favourites to set the ball rolling.


Anyone heard of them, know who makes them and has a link please?
One of the second hand Ninco cars I bought has them on the rear and they seem very good.


The one above says "slot car track for farmers"

I bought my ticket this evening for another Friday trip to the Goodwood Revival in September. The Revival is a highlight of the year for me and Goodwood is my local race track - not counting Madeira Drive for the Brighton Speed Trials.
The Goodwood Revival is a fabulous weekend celebrating the years (1948-1966) when the Goodwood circuit was active. The circuit has been updated to modern standards, but still looks the part - a perfect backdrop for some incredibly rare and exciting cars (and bikes) being driven flat out by talented racers.
Many of the spectators get into the spirit and dress up in period costume and it is possible to get up close to the cars in the paddock and chat to the mechanics, owners and drivers.
Last year the Scalextric team came along with a track and some cars. Hopefully they'll be back again in 2019.
Why Friday? Partly because it is cheaper, but mostly because we get to see all the cars on track for practice and qualifying - followed by the first race of the weekend, the Kinrara Trophy. Then it's home for a weekend of watching the excellent live feed of all the races on Saturday and Sunday. There's more details here: https://www.goodwood.com/motorsport/goodwood-revival/
Front engine car setup,how to
11-22-2014, 02:06 PM
When i started building the Fly Ferrari 250 GTO i saw it as a challenge,i like to solve difficult problems.I certainly did not expect it to do so well,in fact it beat every other car,even the mid engine, overall in International Proxy Series 2014.
During the season one of the entrants asked for a how to and i promised i would do it as soon as i got the car back because i had no photos.
I will start by the front end,describing in detail what i did for a Fly Ferrari 365GTB/4 which is exactly what i did for the GTO.The main issue is to keep the wheels parallel and reduce the play.
We need a piece of brass tube 3/32" internal dia (i buy mine from www.chaskeelingscd.co.uk)
and an 1/8" drilling bit as the tubes external diamater.
We drill the axle posts first using a bit of 3mm then 1/8"(=3,25mm)
The important thing is
-to operate the bit by hand not a dremel,if it gets stuck use a pair of pliers to unblock it
-drill both posts in a single operation to ensure proper alignement,as in photo

We might need to repeat the operation several times until the tube goes through.
Now we need two pieces of tube of length equal to that of the axle holders to which we insert as sleeves with a drop of superglue.
We also cut to pieces of tube 5mm long.
We cut two pieces of 3/32 axle(=2,38 mm-not NSR which is 2.34 or drill blanks, and results to unwanted play) to the desired length.
We solder the 5mm long tube pieces on each axle.

It remains only to assemble the system

The wheels rotate freely and they stay parallel


And the front end of the GTO


Chassis rigidity is the name of the game.
First i epoxied a ball bearing (from dmwproducts) to the transmision shaft support.
Then i replaced the original sprung transmision shaft with a solid one.I used a piece of brass tube with internal dia 2mm ,17 mm long and a piece of 2mm brass rod to extend the motors shaft.Lenghts have to be carefully calculated to allow removal for repairs/corrections.Soldering the parts is not advised,i glued the parts using loctite stud lock.This method allows removal of parts by applying heat, using the soldering iron ,to the brass tube.

Then i braced the shaft holder and the rear axle holders using .062" piano wire

Then i braced shaft holder and motor holder using .048" piano wire

Then i added weight below the rear axle center line to a weight distribution of 58.9% at the back

Finally,i used a guide with leading blade MB17030

The rest of it you know allready,BWA NC1 motor,Ninco tires,and functioning front lights
I know there is some tempest in a tea pot over this, but I was REALLY looking forward to this car. There is over 2 hours of photoshop to get it symmetrical, and clean...mainly the 3D printer lines that hadn't been sanded out. I won't get into the mechanics of the car...anyone who owns one knows. Anyway, I still love the look of the car!


Steve Smith tested one of the new Sloting Plus motors in his Late Model, and won the race. The car also had the brand new Volare body from MonkeyWerx. Next race is on June 30. Come try a car, watch the races, and enjoy some hot dogs with Ruth's Mustard. Call 603-826-4242 for details. Racing is free, as are the hot dogs.


It was in my toolbox for quite some time its called Blu Stuff but it is not always blue(i have found also green or pink) and it softens when heated and returns to its original(hard rubber like) status when cold
From an ebay purchase ,among others ,i became the owner of badly battered Ferrari 512 codalunga
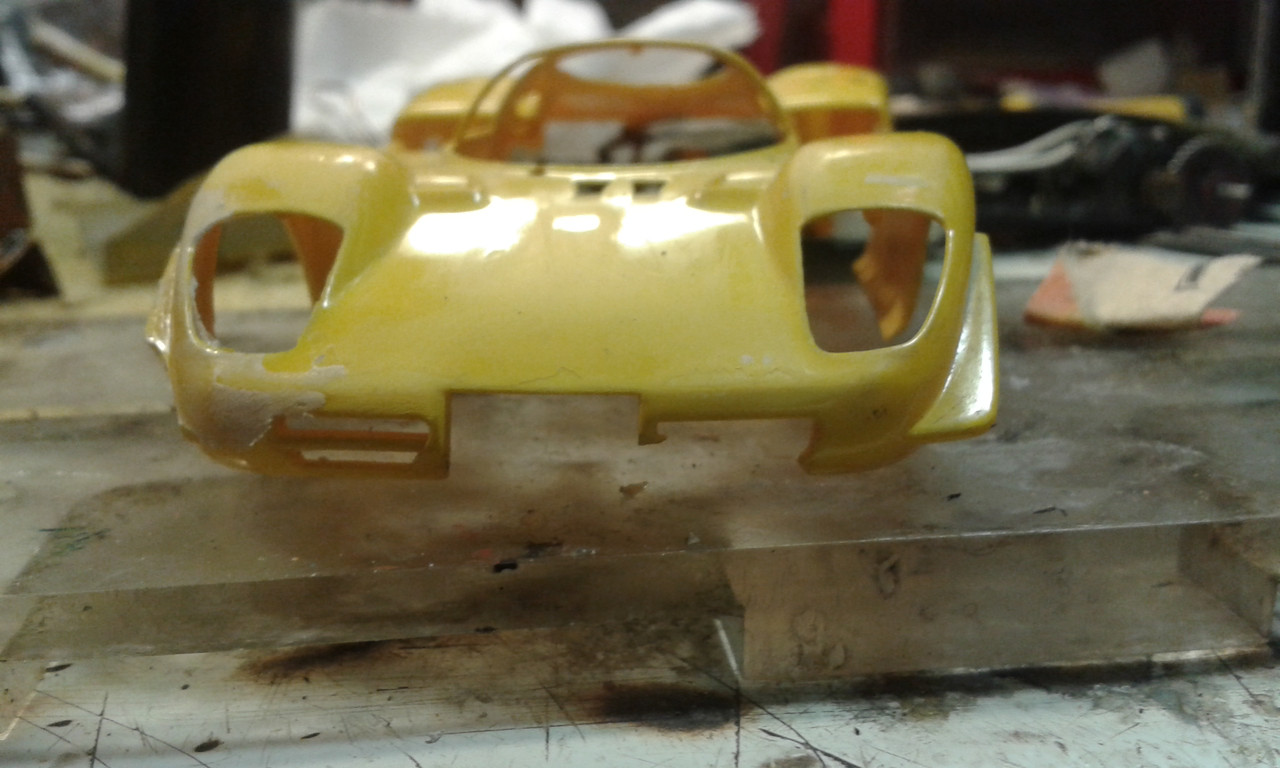
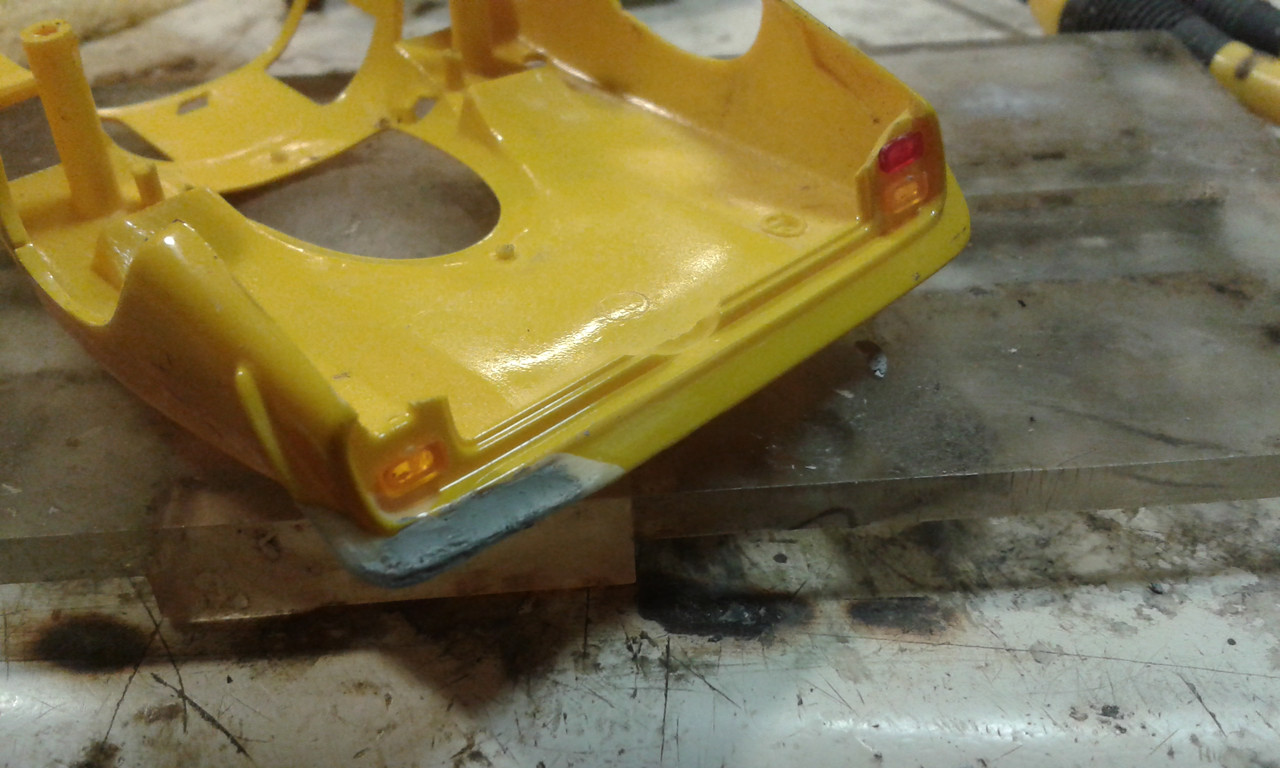
So i decided to experiment with blue stuff .After a first try to assure that this works i moved on.
I heated some blue stuff pouring hot water in a ceramic bowl ( i keeps temp longer) and when it softened i pressed it on a good body
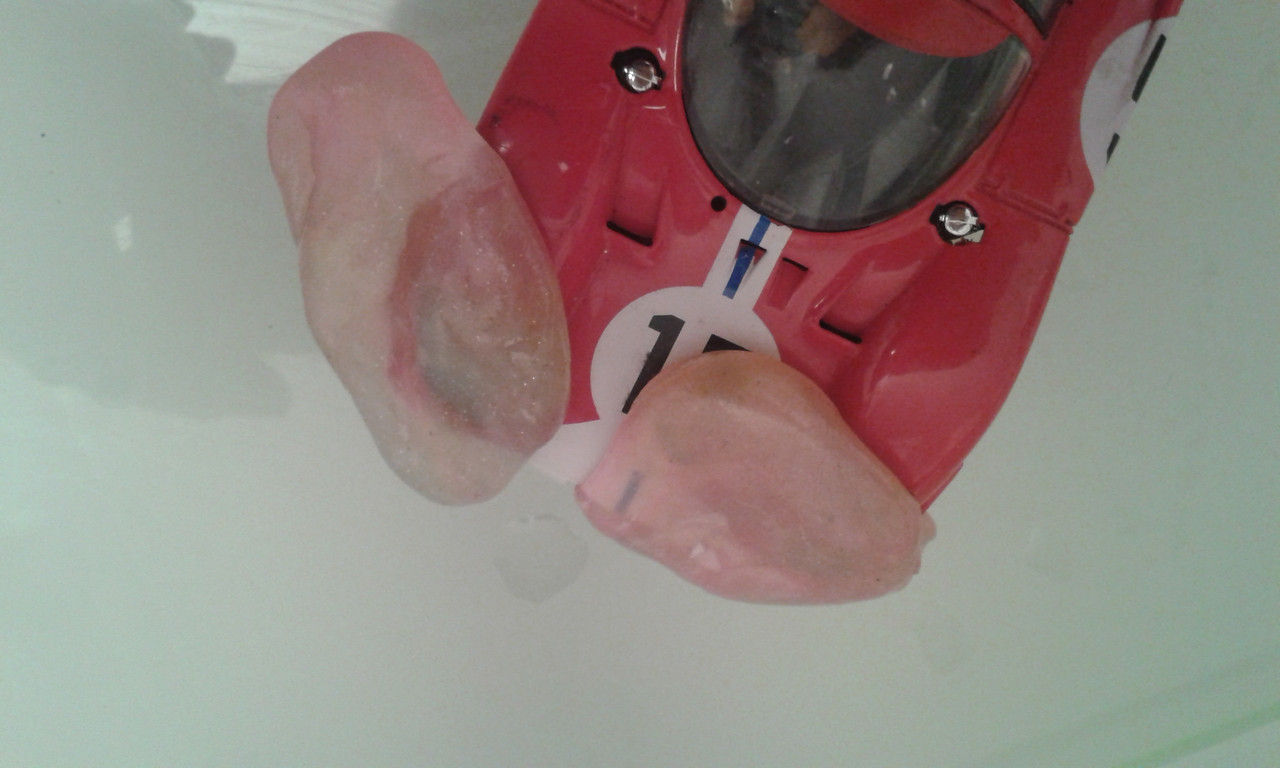
I removed it when cold and fitted it on the battered body securing it with scotch tape.To reinforce the bond i stuffed a heated pin at location

The right front flap was done after 2 tries

The front left grill gave me a hard time but after 5 tries and using allways heated pins it was done
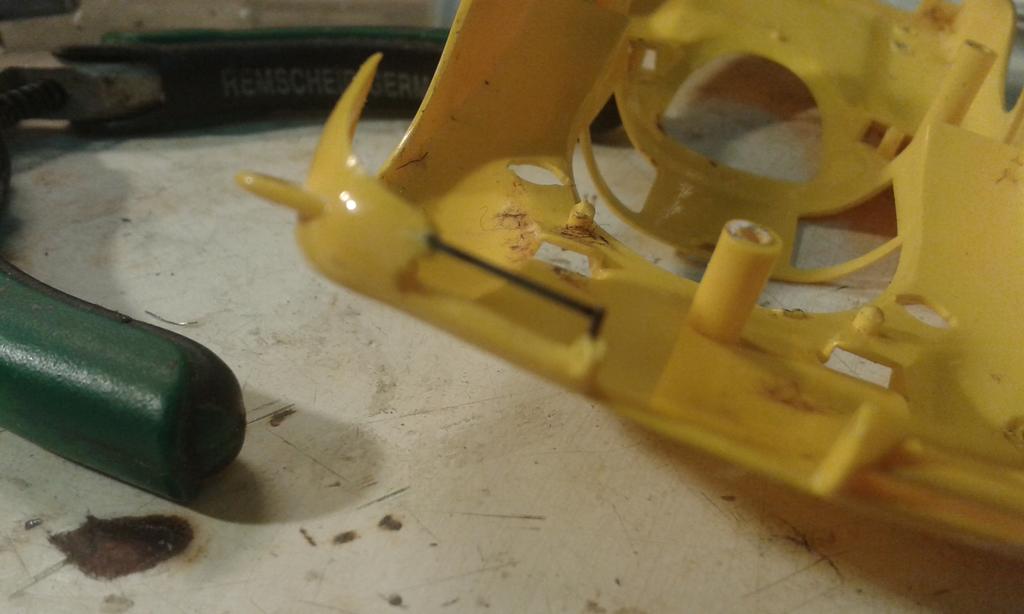
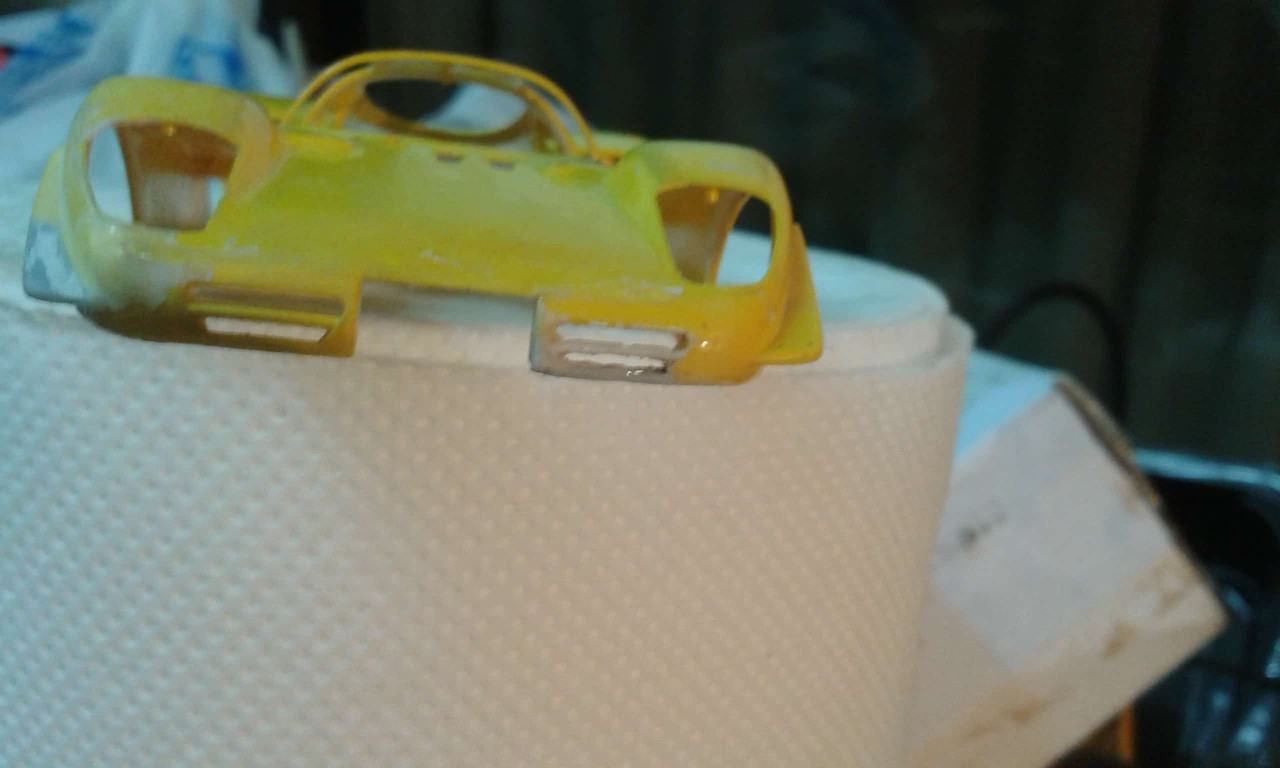
Redone the rear right flap as i had not used a pin and it broke off
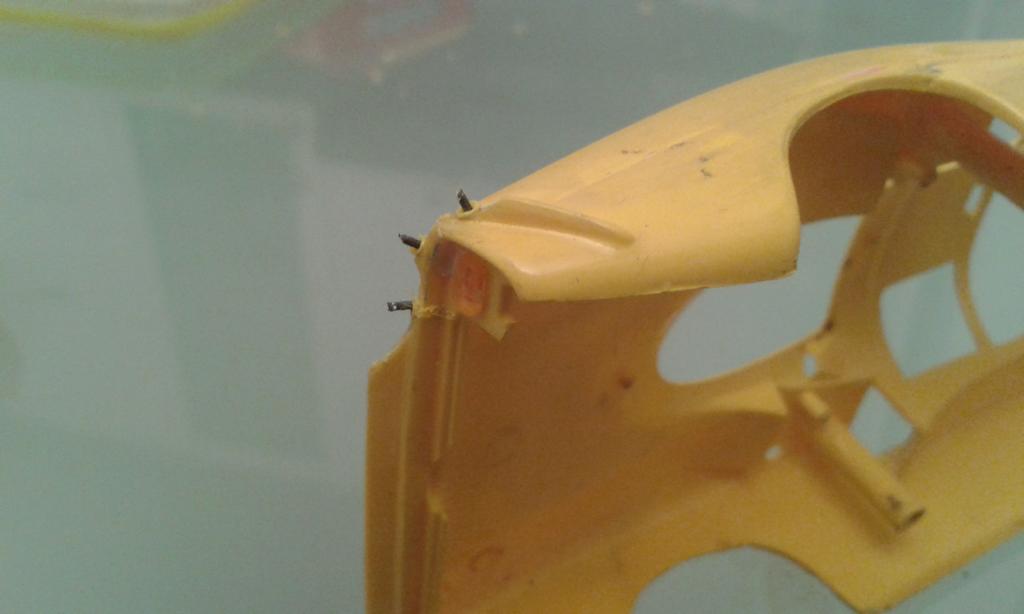

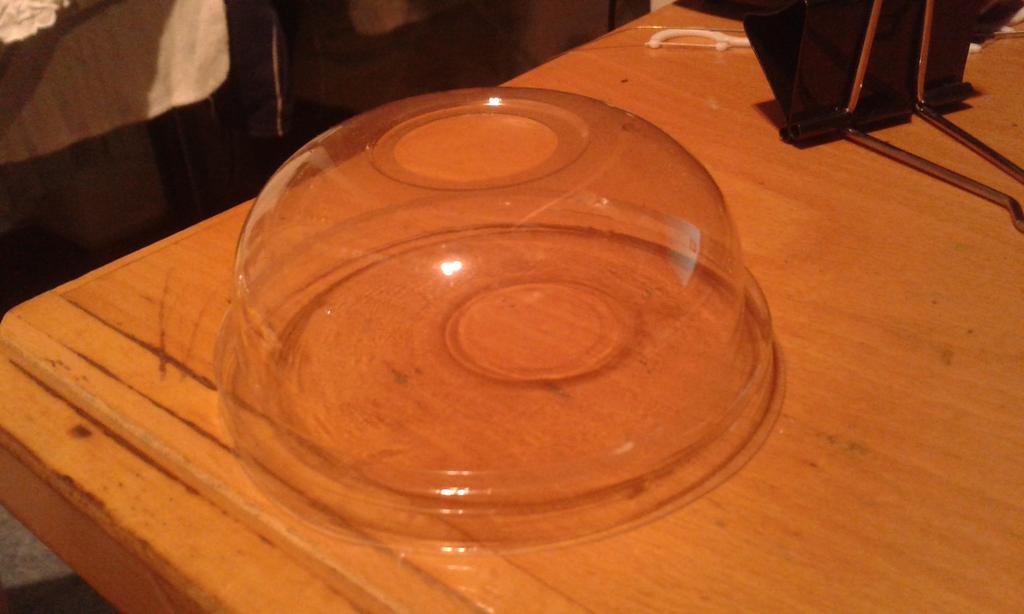
The Codalunga was also missing all transparent parts so i cut a windshield from a coffee cup lid
As good as it gets
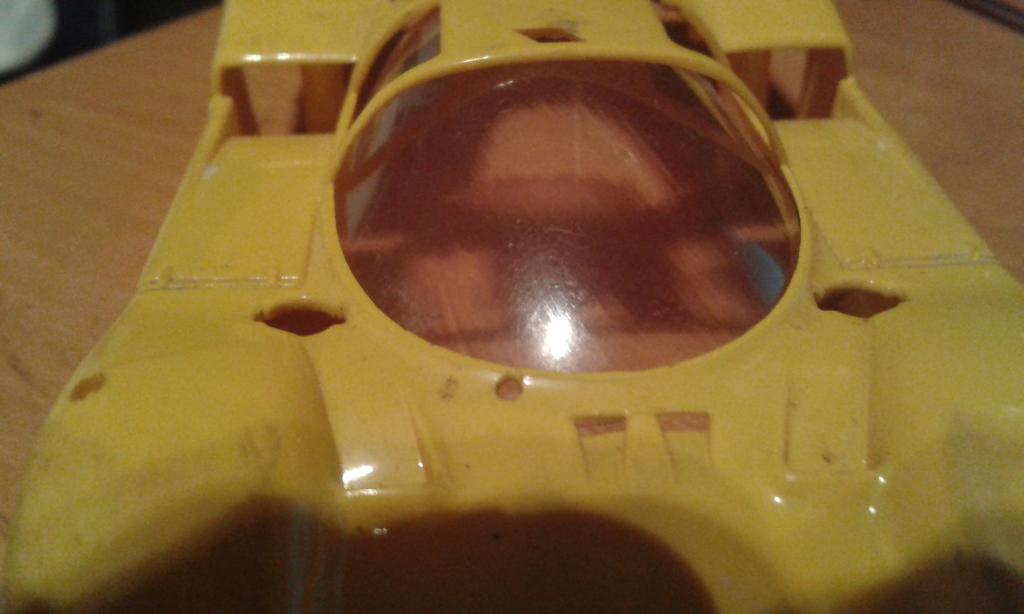
The rear grill remaining to be done,stay tuned

Another one from the "why on earth did they make that" department. I rather enjoy studying failed F1 cars, both 1:1 and the 1/32 variety and there are certainly plenty of examples to be found in the output of the major slot car manufacturers. In this mini series I have already looked at the BRM P83 and the McLaren M9A which had minimal success so now let us turn our attention to another SCX vintage release, the #60910 Sigma F1.
The M9A had a racing history lasting approximately 7 minutes but the Sigma went one better, it never turned a wheel! In fact it wasn't even a legal F1 car. It was actually a research prototype constructed in 1969 to test various safety improvements and was a response to concern about the increasing number of deaths in F1 at that time. It was built by Pininfarina, the design house, in collaboration with the Revue Automobile and with some help from Ferrari which supplied the chassis and engine from an F1 312 V12. It was way ahead of its time in many respects with deformable side pods, integrated wheels to minimise risk of interlocking and a spoiler which doubled as a roll bar. It also had onboard fire extinguishers, a driver survival cell, plastic fuel-tanks, a six point harness and a very early form of the Hans neck safety device.
It was shown at the Geneva motor show in March 1969 and then returned to the Pininfarina museum where it has resided ever since. It is doubtful whether its engine was ever fired up let alone taken out for a spin. Needless to add F1 took absolutely no notice of its safety innovations and it was many years before most of them would appear in an actual F1 car.
Four years later in 1973, for reasons best known to themselves, Exin Scalextric released a model of the car to a bemused customer base who probably weren't even aware of the existence of the 1:1 version! It was actually a pretty accurate representation of the real thing, apart from the weird orange and green colours, and stayed in the catalogue till the early 80s. In 2002 it was added to the growing ranks of the vintage series when even fewer people would know about the project. It was also presented in a posh biscuit tin rather than the fancy boxes of previous vintage releases. This time it was finished in silver aluminium with correct tampo printing and was really a super model with excellent performance but it is debatable whether the real thing is actually that colour as most photos show it to be white. Whether that is a trick of the light or it has been repainted at some point I don't know as some photos do make it appear silver. Without travelling to Italy I am unable to confirm either way. Anybody visited the museum?
So there you have it, another oddball car from SCX. Of course they are not alone in making strange choices of models to produce and I will continue the theme with other manufacturers if people are interested.
I know it's a big ask but is there a 'best go to' tyre manufacturer for racing 1/32 magless cars on a 100'+ Scalextric Sport club track?
NSR? Slot.It? An independent 'cottage industry' manufacturer? Others?
Apart from my one new car, an MSC Metro, I have a mixed bunch of second hand cars from Avant Slot, Carrera, Fly, GSlot, ScaleAuto, Scalextric, SCX, Monogram, MG Vanquish, Ninco and NSR.
It looks as if every manufacturer has their own rim design too  - or do they?
I'd prefer UK availability, as personal import costs are getting silly.